Introduction


Thanks for visiting my page. To help with navigation, here is a list of popular pages all about Marching in Colour

* The History of Marching In Colour - who is the man behind the words and service, how did it all come about

* Commissioning Models for Painting - how the process works, start to finish, and what you can expect

* Gallery of Artists Work - with over 20 years experience, here is a small sample of finished commissions

* ITEMS FOR SALE - as well as painting models, I also sell pre-painted models and assorted loose models and scenery on Etsy and Ebay. Links here!

* Trade in your old models for Painting Credit * click here for details

* To see details of all current commissions booked-in and estimated completion dates - click here

SCENERY and TERRAIN - for pre-made, handcrafted items of scenery and terrain, please click here

For TUTORIALS please follow this link - click here


Monday 7 November 2011

Xericor's Tactica: Choke Points

Xericor's Tactica – Choke points

What do you do if you are facing a numerically superior force, hell bent on over running your position with their weight of numbers? The answer is quite simple – choose a battleground that restricts the enemies ability to bring his numbers into play, in other words fight them at a choke point.

Anyone familiar with recent movies has no doubt probably seen a little film called '300', in which King Gerard 'Leonidas' Butler and his small force of elite Spartan Warriors take on the might of the Persian Empire and its 100,000+ troops. The way they do this is to form up in a bottle neck between 2 cliffs and never allow the Persians to use their superior numbers.

Although the film is a dramatised version of events, the actual real world battle fought out in much the same way, and in military terms is a classic example of the Choke point strategy in effect. But how can we bring real world tactics into game play? In this article I hope to explore the use of the choke point in helping to reduce the enemies numbers and while I use Doom: The Boardgame as an example the theory is easily transferred to any game, board or online, where you are able to position units or buildings, and where natural scenery forms barriers to troop movements. In the photos that accompany this article, the walls form the natural barriers, but these can easily be trees, mountains, or buildings etc. depending on the game you are playing at the time.

Lets start with an overview of the situation. Our four heroes find themselves in a very tough dilemma. The enemy force is clearly superior in terms of numbers and fire-power and standing their ground and fighting would be suicidal, they need a plan!


Pic 1. The supperior enemy force have our heroes trapped


Pic 2. Birds-eye view of the map

From looking at the map we have 3 options – A, B, and C – on where to make our stand. Take a look at the board and think, where would you stand and fight?


Pic 3. The map with points A, B, and C marked out

Would you choose Option A – meet the enemy head on. From here you are in the thick of the fighting straight away, no skulking manoeuvres needed, its a straight up fight.

Or perhaps Option B – the half way point. They cant get past you, and you will be facing them on equal footing 2v2.

Finally Option C – pull back, give ground then form a new defensive line and channel the enemies attack?

Lets look at he Options in detail

Option A

Pic 4. Set up for Option A

We deploy our troops at the neck of the choke point, with the narrow behind us, and allowing the enemy to use the open ground. Where is the problem here? Its true that the enemy cant surround us, we have held off the attack, but look at the number of squares we occupy (and can attack from) compared to the number the enemy can hold. We have 2 attacking squares, the enemy can theoretically occupy 5, of which 4 can attack.

This means the enemy not only outnumbers us, but now out-guns us as well. Option A therefore is a very bad place to hold for us.

Option B

Pic 5. Set up for Option B

Now we have moved further down the corridor, we have a frontage of 2 and the enemy, despite their superior numbers also has a frontage of 2. We are now on equal terms and have succeed in reducing the enemies advantage. Perfect you would think, but is it the best choice?

Option C

Pic 6. Set up for Option C

We have withdrawn all the way back to the open space at our side of the map. Can you see what has happened to the enemy once they pursue us? The vast numbers of the enemy are now funnelled into the corridor. The enemy has a frontage of 2, while we with the space to operate, have a frontage of 4. In other words we can bring more guns to bear on the enemy than they can on us, and the tight space of the passage means the enemy can only move through in pairs. Everybody who chose option C, well done, we shall make a tactical genius of you yet!


In Summary -
When viewing a map, or board, look for areas that restrict movement. These can be used as choke points when you are facing a superior foe. When the time comes that you need to use the choke point always remember to leave the tight space for your enemy! Build your defences, station your troops, on the large open space closest to your side of the choke. Remember – maximize your frontage, restrict the enemies, and you will have made best use of the tactic: Choke point.
Wednesday 2 November 2011

Age of Empires Online - Improving your APM

Xericor's Tactica Empires – Improving your APM, Practice Guide

When we first start out in RTS games we often find ourselves clicking one unit or building, checking to see what it does, then clicking another icon, usually a 'build unit'. Once we have units we tend to group them all as one block, and concentrate on moving that block. Our attention is always focussed on one specific area at a time, but as our confidence grows we find our speed increases, we don’t need to read and double check details as much, and our game play improves.

The rate at which we play can be measured by our 'Actions Per Minute', or APM, with a faster APM meaning faster reaction times and the more we achieve in less time.

Consider the AI/Computer. It is capable of viewing all of its units and buildings at the same time, and to issue commands to all at the same rate. As a player we cant hope to match this, but we can practice emulating it.

A higher APM generally makes us a better player. In this article I hope to show you some practical methods to increase your APM as well as an actual repeatable quest in which you can practice increasing your times.

First Rule: Use your mouse AND your keyboard
When we start out playing, we are shown mouse commands, and we click on every icon, every picture, every unit. Often moving our mouse across the entire screen, and often trying to land the cursor on a very small area. We never learn that a lot of what we need can be achieved with the keyboard. We only need one hand to operate the mouse, use your other hand on the keyboard.

Second Rule: Use Hot-keys
You will find that a lot of the actions we need to take (left clicking on an icon) have a keyboard equivalent. Rather than trying to aim our mouse cursor all over the place, learn the keyboard stroke and implement a combination of mouse+keyboard. For instance a Barracks will produce a Spearman if you press the 'A' key while the barracks is selected. The Barracks is a large target on the map, the Spearman picture is a small target for the mouse, save time and effort by just pressing 'A'.

Third Rule: Assign Hot-keys/Groups
By pressing CTRL+any numerical key when we have something selected (Barracks, 5 Spearmen etc.) we assign that selection to the keyboard. On pressing the selected number we bring up the option to the front of our control. If we assign our Barracks to CTRL+1, then when we press the '1' on our keyboard the Barracks will be selected. Then we already know that by pressing 'A' we can train a Spearman, so when we combine the two – pressing 1 then pressing A, we can train a unit just from the keyboard, leaving us the use of our mouse for something else.

Fourth Rule: Set Way-points
Normally when we train a new unit, it appears on the screen standing next to building which created it awaiting orders from us. While technically not 'increasing' our APM, setting Way-points can save us time to concentrate on more pressing matters. To set a Way-point simply click the desired building then right click anywhere on the map. A little flag will appear and all units trained from that building will head towards the flag. In the case of villagers if you select a resource or building in progress they will work that area. Military units will attack way-pointed targets.

In summary -

All you need to learn to improve your APM is to transfer some of the commands you would normally use from your mouse, to your keyboard.


Improving APM Practice Quest – Challenge: Kill the Docks

This is a low level quest on a small map, with easy achievable objectives. Perfect for practising improving your APM. Once the game starts, follow these simple steps -

The first thing we need to do is set our Town Centre way-point to the patch of gold near our base and train 1 villager, select the Town Centre, then with the mouse right click on the gold patch and with the keyboard press the A key.

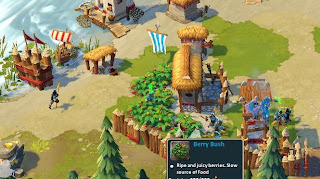
Next select our 5 villagers and order them to build a storehouse near the berries, select the villagers and hold down the SHIFT key, select build storehouse, then once the blueprint appears on the map, right click on the berries (keeping the shift key held down). The villagers will now build the storehouse and when its finished will automatically begin harvesting the berries.


Pic 1. Begin by assigning 5 villages to berries and train 1 villager for gold

Now we need to start producing troops. Select the Barracks and assign it the Hotkey number ONE (select the Barracks and press CTRL+1). Press A several times, till you run out of minerals, and start training Spearmen. Set the way-point (right click with the mouse) down the hill to the north of your base.


Pic 2. Set your Barracks to the hotkey numerical 1

Send your starting troops down the hill to the north and begin fighting.


Pic 3. Set your waypoint down the hill, so your newly trained spearmen will rally straight to the fight

Practise switching between controlling your troops with the mouse and pressing the keystroke 1 (select Barracks) and the keystroke A (train Spear) to train more troops.

Don’t forget to press 1 and right click the mouse to assign the way-point closer to the fighting as you progress towards the enemies base.


Pic 4 and 5. As the fighting progresses, continue moving your Barracks rally point closer to the enemy base

Keep practising,
with your mouse – controlling your troops, ordering them to attack different targets as needed AND setting your Barracks Way-point closer to the action
with your keyboard – pressing 1 to select the barracks and A to train more spearmen.


Pic 6. Notice how we are able to keep track of three seperate combats (1 main group attacking the archery, while 2 sets of 2 spearmen combat the ships) and keep our reinforcements streaming in to the centre of the combat zone

By using this method you don’t need to return to your base at any time. Leaving you time to concentrate on the fighting at hand, all the time knowing your villagers are working and that your Barracks are delivering troops right to the heart of the battle.

Once you can beat this challenge in under 5 minutes on normal, increase the difficulty to Elite. The quest at both levels is very similar, the only difference being the AI will produce Elite Archers which will hurt your Spearmen a lot. The challenge is to be fast enough to fight your way into the base and destroy the Archery before they can produce troops. If you can do this then you have a good APM!

After getting the hang of improving your APM on this map, try adding more hotkeys and playing a different map. Use number 1 for your Town Centre, number 2 for your Barracks, 3 for your Archery etc.

Hope this helps!

Tuesday 1 November 2011

Age of Empires Online - The Scout

Xericor's Tactica Empires – The Scout

At the start of a game we all receive a free Scout unit, and with the exception of consumables or priest conversion, we only get one of these very versatile units, but are you putting him to the best use? In this article I will discuss the role of the Scout and hopefully show you new ways to improve your early game.

The Scouts Main Purpose – Revealing the Map

Find the Enemy!
One thing you can be sure of in nearly every game is that somewhere, out there in the darkness, in the fog of war, lies the enemy, hell bent on your destruction!Your Scouts first job therefore is to locate the enemy base (or bases), so we can see the distance between them and us.
Once you have set your villagers to work, there isn’t much you can do with your Town Centre until the resources start flooding in, so concentrate on using your scout to reveal the map. Remember to use his vision to the full extent. The Scout can see 360 degrees around him, so don’t have him running down one side of the map where part of his vision is wasted. Keep him moving so that the edge of his vision is the edge of the map, or the edge of his vision is the edge of his last revealed area. By doing this we reduce the time he needs to reveal the battlefield leaving him more time for other duties.

Don’t forget – pick up any herd animals your scout finds and send them back to your TC straight away.

Now that we have the map and the location of the enemy revealed we can start to plan the rest of the game. From the location of the enemy and the terrain features of the map (locations of forests, cliffs etc.) we can plot all the possible attack routes our enemies will take to reach our base. In the case of the AI they tend to take the most direct path. From this we learn where to concentrate our defences and where we can safely expand to. We do not want to build any storehouses in the path between the enemy and us, we want to expand away from the danger zone, for when the attack does come we need our villagers to safely continue gathering the resources in peace and quiet away from the conflict.

Top Tip – once we have located the most direct route, what can we do about the others? Well, we could build watchtowers, or send units, but these all cost resources, and resources are too valuable at the start of the game to waste on 'what-if's'. So, remember those herd animals we have collected? Well they have a small LOS, but more importantly they instantly switch control as soon as they are contacted by enemy forces. Position the animals along the paths of concern, if you lose control you know the enemy is there!


Scout Tactic #1 – Harassment

It is important to remember the Scout is not a military unit. He does not excel at fighting, leave that to the Hippokons, but that isn’t to say the Scout is completely useless, what he lacks in strength and DPS he more than makes up for in speed and LOS. Once we have the map revealed we can see not only our possible expansion locations, but those also of the enemy. The Scout now reveals his 2nd useful purpose – worker harassment.
With his extended LOS he can keep tabs on mineral patches, fishing spots, great locations for next Town Centres etc. and when he sees an enemy villager begin work, he can swoop in and attack the villager.
It is important to note his intention should not be to kill the villager, this will take to long, but to force a cancel on the building and delay the enemies progress.

Avoid prolonged fighting, and concentrate solely on the workers who are trying to build. The whole purpose in harassment is not to inflict casualties but to delay the enemies build, buying us time to gain an advantage. If the worker doesn’t withdraw, its likely the scout will kill him and stop the build. If the worker does withdraw, the AI (or player) saves a worker, but our harass is complete as we have delayed the building.


Pic 1. The Scout locates an enemy villager starting to build a dock, from here the Scout can attack the villager and force a cancel on the building

Scout Tactic #2 – Observation and Early Warning

Given his long range of sight a Scout can keep tabs on the enemy from such a distance that he remains out of sight of any hostile forces, except other scouts. Most players, as well as the AI have, or set, rally points for the units they are creating. Position your scout so that he can see the rallied forces. From there we can see what the enemy is producing, and at what rate, allowing a clever player to figure out what materials and in what quantities the enemy is gathering.
One you know the type of units the enemy is producing, you know what the best counter is.


Pic 2. Using his long range vision the Scout keeps watch on the enemy forces

In the scouts role as 'early warning' you know when the enemy is moving out, and by which route. This is perfect for spotting any tricky manoeuvres designed to take you by surprise.
If things get too tough for the scout or he is spotted, he is fast enough to relocate, but always try to keep his vision between your base and the enemies base. The more warning you have on when the enemy is on the move the better.


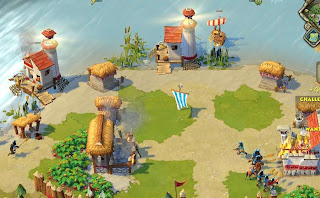
Pic 3. A Scout spots a small detachment of enemy forces moving for the attack.

Another role the scout is good at is keeping watch over mineral/resource patches. If the player, or the AI, isn’t savvy about his placement of storehouses, he could find several vulnerable villagers out of position for his forces to protect, allowing you to send in a small detachment of troops, kill the villagers and burn the storehouse before the enemy military can react.

Scout Tactic #3 – Kiting

The method of kiting is like a chase – the Scout gets the AI to focus on killing him, then leads them round and around knowing that the Scouts speed means the enemy unit will never catch him, all the while the enemy is taking hits from nearby buildings (Town Centres, Guard Towers, etc.).

This tactic is best used to deal with early level attacks, the type where the AI will send out 4, 5 or 6 infantry units early on to harass the player. In this case its the Town Centre that does the shooting while the Scout kites the enemy in a circle. Dealing with early attacks using this method insures no time is lost by villagers gathering resources as there is no need to sound the Town bell.

The Scout is also unique in that he cant be snared by enemy hits, so even if you do slip up a little and the enemy lands a couple of blows it will not effect the usefulness of this early strategy.


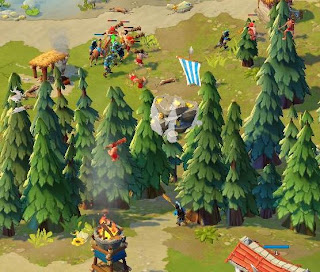
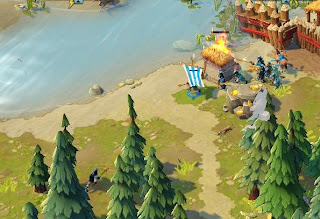
Pic 4 and 5. The Scout leads the enemy in a circle while the Town Centre continues shooting arrows.

In summary the maximum use of the Scout can be achieved by remembering these simple steps -

Explore – reveal the map

Gather – collect any herd-able animals

Harass – attack enemy workers to delay building construction

Observe – keep an eye on enemy forces and when they move out

Kite – deal with early threats by playing 'chase me' within range of your Town Centre